We can't find the internet
Something went wrong!
Raspberry pi dlna server

- Created: 02/05/2015
- Last updated: 13/12/2024
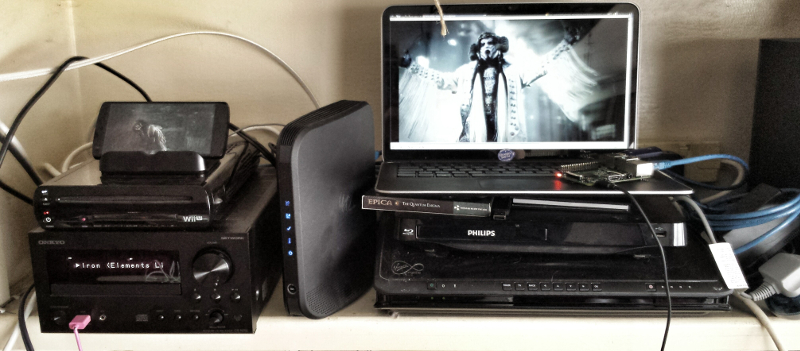
At home both my lovely fiancee and I play music on our phones, laptops, and our hifi. Also we both watch video on the tv, phones, and laptops. Until recently this meant having many copies of many files on many devices, changing cds, or plugging some device into another. This is rubbish.
All of these devices as it turns out speak DLNA, and I have a small heap of raspberry pis sitting about the place. So why not turn one into a streaming media server?
For this I would need to set up the following on my raspberry pi:
- A static ip address,
- A DLNA Server,
- A convenient means of uploading files,
- Also quite a bit of storage.
And then I did! This is how…
First up, quote a bit of storage! I set up my pi 2 with a fresh install of raspian, and then checked that everything is up to date:
sudo apt-get update && sudo apt-get upgrade -y
Plugged in a usb hard drive, connected to my network via ethernet, and sshd in,
and then lsusb … no hdd, lsblk… same. How annoying! It turns out the pi
hasnt got enough juice to power this ssd over usb, and that this is a common problem.
So I ordered a powered usb hub, and tried again later.
Later…
Storage…
I do not want to manually mount this drive each time I restart the pi. The way to sort this out is to edit the file system table. But first I need the location, UUID and format type of my hard drive:
lsblkWhich gives me the location:
NAME        MAJ:MIN RM   SIZE RO TYPE MOUNTPOINT
sda           8:0    0 931.5G  0 disk
  sda1        8:1    0 931.5G  0 part
...
Then:
sudo blkid /dev/sda1Which returns the UUID, and format type:
/dev/sda1: LABEL="Seagate Expansion Drive" UUID="4A9A1A899A1A7225" TYPE="ntfs"
In order for the pi to be able to write to a ntfs formatted disk, I could either
re-format it which would take ages, or install
ntfs-3g… (sudo apt-get install ntfs-3g).
Now I can add the following row to /etc/fstab:
UUID=4A9A1A899A1A7225 /media/usbhdd ntgs-3g defaults,user,exec,uid=1000,gid=100,dmask=000,fmask=111 0 0
If you are following along, you will want to use your disks UUID, and check your
user id id -u, and group id id -g. There is a link at the bottom explaining
these settings.
Now mount it:
mount -a
This will alert you of any errors with /etc/fstab. Check dmesg if you do get
any errors. It should work fine so make some directories to put media in later:
sudo mkdir -p /media/usbhdd/{Music,Photos,Videos}Now restart the pi. The disk should be automatically mounted on boot.
sftp
Next I want some media for my pi to serve. This bit is easy, you can sftp into
the pi. On Ubuntu I will use nautilus as an sftp client
nautilus sftp://pi@192.168.0.10… Now I can drag and drop media files onto
my pi!
miniDLNA
The main point of all of this is to set up a DLNA server. For this I will use minidlna
sudo apt-get install minidlnaAnd configure it to serve files from my hard disk.
sudo vi /etc/minidlna.confI want to serve music, photos, and videos from their respective folders on on my hdd. To do this I added the following lines:
media_dir=A,/media/usbhdd/Music
media_dir=P,/media/usbhdd/Photos
media_dir=V,/media/usbhdd/Videos
friendly_name=Pi
inotify=yes
The comments in /etc/minidlna.conf file explain all of this.
Now start minidlna:
sudo service minidlna start
Minidlna will build its indexed on first boot. You can run sudo service minidlna force-reload to redo this at any point. You should do this if you
change minidlna.conf at all.
And set it to start on boot:
sudo update-rc.d minidlna defaultsStatic ip address
And last, but not least… For convenience I want my media server to be at the same ip address each time I start it up.
For this I need to know the pi’s broadcast, and the mask addresses.
ifconfig gets these for me. I also need the gateway address which I get with
route -nee.
Now I can edit /etc/network/interfaces.
The pi is using dhcp by default, to change this to static, I replace this line:
iface eth0 inet dhcpWith the following:
iface eth0 inet static
address 192.168.0.201
netmask 255.255.255.0
network 192.168.0.0
broadcast 192.168.0.255
gateway 192.168.0.1
The IP address in the 200 range is outside of the dhcp range of my router, so this address will never by assigned to another device.
And there we go. I now only need enough music on my phone to last the day at work, but can listen to any of it when I get home, and there will be no hassle wiring the laptop up to the tv when its movie time :)

After a quick test the performance is plenty good enough, better than I had expected in fact! And apart from a few hardware setbacks getting started, this was a quick and easy project.
Next steps:
- Set up a convenient means of downloading media directly to the pi.
- See how performance can be improved.